Discover the magic of science and creativity with our guide on How to Make a DIY Lava Lamp. Learn easy steps to craft your own mesmerizing masterpiece while adding a fun and personal touch! Have you at any point contemplated adding the spellbinding shine of a lava lamp to your home without really getting one? Making a DIY lava lamp is significantly not so troublesome — and it’s an incredible mix of science and innovativeness! Whether you’re looking for a pleasant action to do with your children, an intriguing science exploration, or a unique stylistic layout piece, this undertaking checks every one of the cases.
Utilizing only a couple of normal family things, you can make a hypnotizing homemade lava lamp that air pockets and shines with lively tones. The greatest aspect? You can completely redo it to mirror your novel style. Prepared to bring some enchantment into your space? Could we skip into this straightforward and wonderful course of making your very own lava lamp.
DIY Lava Lamp: A Fun and Creative Project
Making your own DIY lava lamp is an intriguing and involved project that mixes science, imagination, and a dash of wistfulness. Whether you’re hoping to add an idiosyncratic piece of style to your lounge or just need to participate in a tomfoolery try, making a lava lamp without any preparation offers the ideal chance to release your inward DIY fan. Furthermore, it’s an extraordinary method for investigating the interesting science behind the hypnotizing magma impact!
A DIY lava lamp isn’t just a drawing in development; it can similarly be a trendy extension to your space. Envision a comfortable corner of your lounge enlightened by the delicate shine of a table light, with your homemade lava lamp tenderly percolating away next to it.
The warm, musical development of the “lava” makes a quieting air that is great for loosening up in the wake of a difficult day. The magnificence of a Do-It-Yourself lava lamp is that you can modify it as you would prefer – from the shades of the fluids to the holder shape, giving it an individual touch that standard table lamps for lounges could need.
Materials You Need to Get Started
For the fundamental arrangement, you’ll require a holder (a glass container or container works best), water, oil (vegetable or mineral oil), and a bubbly tablet like Alka-Seltzer to make the percolating impact. The key is to utilize fluids with various densities — water is denser than oil, which is the reason they don’t blend.
The bubbly tablet causes the gurgling impact, as it makes gas bubbles that ascent through the oil, emulating the famous magma movement. You can likewise add a couple of drops of food shading to the water to give your lava lamp that signature dynamic look.
Presently, to add some additional energy to your light, why not consider the lighting that will supplement it? A floor lamp with table is an incredible choice to coordinate with your DIY lava lamp, offering both pragmatic lighting and an in vogue base for your new creation.
In the event that you’re after a perky, stylish energy, take some motivation from the Shop Pottery Barn Teen Mushroom Lamp. Its tomfoolery, adjusted plan can impact your lava lamp’s shape or even the tones you decide for the fluid layers. By integrating components of this cutting edge plan pattern, you can make a lava lamp that reflects both inventiveness and style.
Setting Up Your Workspace
Before you start making your DIY lava lamp, setting up a perfect and coordinated work area is essential to guarantee a smooth, charming experience. Making your own lava lamp includes a couple of fundamental materials, and with the right arrangement, you’ll stay away from superfluous wrecks and make the cycle more proficient.
Accumulate every one of the essential materials, including your holder (a glass jug or container works best), water, oil, food shading, and bubbly tablets. In the event that you’re uncertain of how to make a lava lamp, having all that set up will make following the means more straightforward and less distressing.
The lava effect practical DIY can get somewhat chaotic with the oils and water, so setting up a devoted region for the investigation is fundamental. When your work area is ready, now is the ideal time to bring the study of thickness and compound responses to life.
You’ll have to carefully layer the water and oil in your holder, trailed by the expansion of the bubbly tablets, which will set off the lava-like impact. Watch as the two fluids don’t blend, making the ideal circumstances for the effervescent lava development.
Step-by-Step Guide to Creating a DIY Lava Lamp
Making your own lava lamp is a basic yet remunerating project that offers an involved method for investigating science while creating a fun beautifying thing. In the event that you’re considering how to do a lava lamp, the cycle is not difficult to follow and requires only a couple of key materials. We should stroll through the moves toward assist you with making an entrancing lava lamp that will add a special touch to your home.
- Step 1: Choosing the Right Container
Begin by choosing the ideal holder. An unmistakable glass container or container works best as it permits you to see the magma impact in the entirety of its brilliance. The size of the holder will decide the general impact and look of your lava lamp. For a bigger, more emotional impact, select a tall container, while a more modest container makes a more minimal presentation. - Step 2: Layering Water and Oil
To create your own lava lamp, you’ll have to add water and oil into the compartment. Start by filling the holder most of the way with water. Then, at that point, cautiously empty the oil into the compartment until it’s almost full. You’ll see that the oil will drift over the water because of its lower thickness. - Step 3: Adding Colors for a Visual Pop
Add a couple of drops of food shading to the water to give your lava lamp that signature dynamic tint. The variety will sink to the lower part of the compartment, making a beautiful differentiation with the oil. You can try different things with various shades to match your home stylistic layout or temperament. - Step 4: Activating the Lava Effect with Tablets
To set off the notable magma movement, add a bubbly tablet (like Alka-Seltzer) to the compartment. When added, the tablet will start to bubble, delivering gas bubbles that ascent through the oil, making the twirling magma impact. This is the second you create your own lava lamp venture and becomes fully awake, as the fluid moves and air pockets very much like the exemplary lava lamp of the past.
How to Make a Lava Lamp Without Alka-Seltzer
On the off chance that you don’t have Alka-Seltzer close by, you can definitely relax! You can in any case make an enrapturing DIY lava lamp utilizing elective fixings. How to make a lava lamp without Alka-Seltzer is basic, and there are a couple of other normal family things that can make a similar gurgling and streaming lava impact. How about we investigate how to accomplish this tomfoolery project without requiring Alka-Seltzer.
- Step 1: Prepare the Container
Very much like the customary technique, begin by filling your holder most of the way with water and afterward finishing it off with oil. You’ll need to ensure the oil is totally over the water, as the need might have arisen for the lava impact. - Step 2: Add Color
For the dynamic, eye-getting look of an exemplary lava lamp, add a couple of drops of food shading to the water. The variety will settle at the base, upgrading the visual allure as the lava impact unfurls. - Step 3: Add Baking Soda
To make the gurgling activity, add about a teaspoon of baking soft drink into the holder. You’ll see the water start to bubble as the baking soft drink responds with the vinegar. - Step 4: Add Vinegar
Presently, gradually empty vinegar into the compartment. As it consolidates with the baking pop, the gas bubbles ascend through the oil, making the entrancing astro light impact. You can change how much baking pop and vinegar relying upon the size of your compartment and the force of the gurgling you need. - By utilizing this straightforward technique, you can in any case make a thrilling lava lamp impact without Alka-Seltzer for lava lamps, offering a down to earth, savvy fix that is both fun and easy to make!
How to Make a Lava Lamp Without Baking Soda
While baking soda is a popular choice for making a DIY lava lamp, it’s not using any and all means the main decision. In the event that you’re considering how can I make a lava lamp without utilizing baking pop, there are a lot of options that can in any case convey the entrancing, foaming impact. The way to make your own lava lamp is finding the right mix of fixings that connect to create that work of art “lava” movement.
- Step 1: Prepare the Container
Begin by filling your holder most of the way with water, trailed by pouring in oil. As usual, oil ought to be set over the water because of its lower thickness. This layering is fundamental for accomplishing the mark lava lamp impact. - Step 2: Add Color
To accomplish the lively look of an lava lamp, add a couple of drops of food shading to the water. The variety will sink to the base, adding a visual pop to the plan and making an interesting difference with the oil above. - Step 3: Add Salt
Presently, add a spot of salt into the holder. As it sinks to the base, you’ll see the water begins to move and rise through the oil. - Step 4: Watch the Lava Effect
The salt breaks up leisurely, and as it does, it discharges gas, making the gurgling impact that emulates the magma movement. The water rises and falls, very much like the exemplary lava lamp. You might have to add more salt for a more grounded impact, contingent upon the size of your holder.
You may be asking yourself, how much does a lamp cost for this Do-It-Yourself project? Fortunately, this is a reasonable undertaking — salt, oil, and food shading are modest materials, making this a financial plan accommodating choice for making your own lava lamp. With only a couple of basic things, you can partake in the tomfoolery, streaming magma impact without baking pop!
Top Oils for the Perfect Lava Lamp
The most well-known decision for a lava lamp is mineral oil. It’s unmistakable, has a predictable consistency, and doesn’t blend in with water, which is significant for the exemplary lava movement. Mineral oil is generally accessible and economical, making it an incredible go-to choice for your DIY lava lamp.
To explore different avenues regarding different oils, vegetable oil is another strong decision. While it’s marginally thicker than mineral oil, it actually makes a nice lava impact. You can likewise have a go at blending various oils to get the ideal stream and clearness.
DIY Lava Lamp Jars: Picking the Perfect Vessel
While making your own DIY lava lamp, choosing the right container or compartment is similarly pretty much as significant as picking the right oils and fixings. The holder you pick influences the visual appeal as well as assumes a critical part in how well the lava impact functions. How about we investigate a few incredible choices for containers and holders to make your lava lamp stick out.
For the exemplary look, glass jars or jugs are a great decision. They permit you to obviously see the entrancing lava movement and are ideal for displaying the brilliant fluid inside. You can utilize any unmistakable compartment, yet it’s essential to pick one that is durable and has sufficient level to make a sensational lava impact.
Tall, thin holders will generally work best, as they permit the lava to rise and fall smoothly. A decent tip is to utilize a container that isn’t excessively wide, as this can make the fluid spread excessively far, diminishing the power of the lava development.
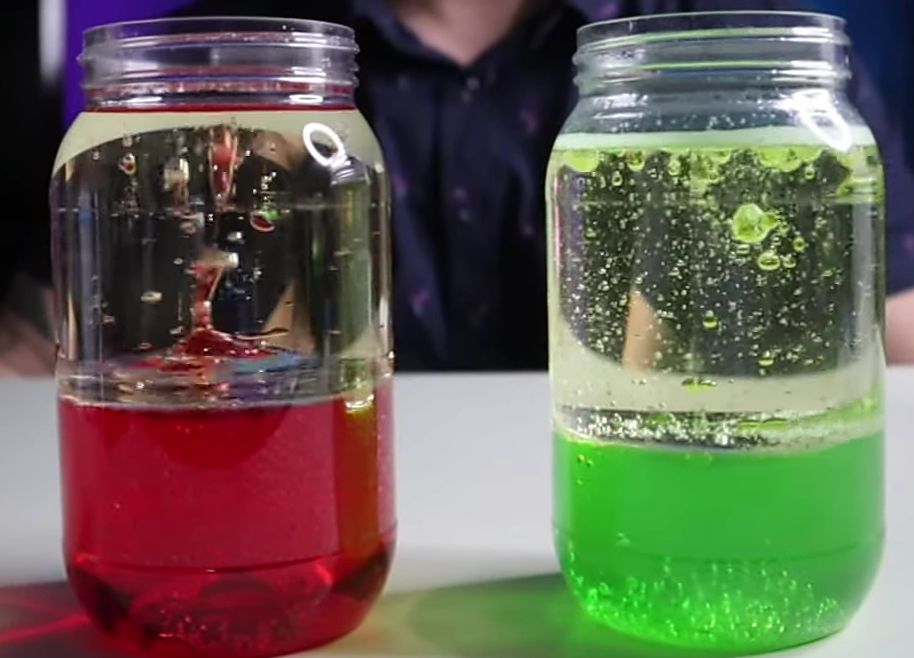
In the event that you’re going for the gold a pop of variety, you can explore different avenues regarding a red lava lamp liquid. Adding red food shading to the water gives your lava lamp a strong and lively look, making it a focal point in any room. The difference between the red water and the reasonable oil makes an eye-getting visual, while the air pockets ascending through the fluid bring the lava effect to life.
Creative Customization Ideas
One of the most outstanding pieces of making your own DIY lava lamp is the capacity to fit your personal style. Whether you’re going for a lively energy or something more refined, there are vast ways of making your lava lamp special. We should jump into a few imaginative thoughts that will take your Do-It-Yourself undertaking to a higher level.
For a fun and whimsical touch, think about planning a Hello Kitty lava lamp. Assuming you or your children love Hello Kitty, why not integrate the charming person into your lava lamp plan? You can track down Hi Kitty puppets or stickers to improve your container, or even utilize a Welcome Kitty-themed holder to house the lava lamp. Adding these fun loving components will give your light a customized, bright look that sticks out.
How to Make a Homemade Lava Lamp That Lasts Forever
Making a homemade lava lamp is a fun project, but envision a situation where you really want it to continue onward into the endless future. The way to make a dependable lava lamp lies in the materials you pick and how you care for it over the long run. In the event that you’re considering how to make a homemade lava lamp that perseveres, follow these basic hints to guarantee your creation stays in wonderful working condition.
Begin with top notch materials. Pick a reasonable glass compartment that is sufficiently solid to hold the fluids and temperature changes. For the oil, mineral oil is an incredible choice, as it stays clear and doesn’t get shady after some time. Try not to utilize vegetable oil, as it can debase all the more rapidly and cause the lava impact to dial back.
While adding food coloring, utilize only a couple of drops to try not to make the water excessively thick. A lot of shading can make the fluid more thick and influence the progression of the lava. For the foaming activity, consistently utilize bubbly tablets like Alka-Seltzer.
Yet make a point to add them in modest quantities as it were. Such a large number of tablets on the double can cause an excessively fiery response that can harm the construction of your lamp over the long run.
Lava Lamp Experiment with Baking Soda: Explained
On the off chance that you’re hoping to add a great science contort to your DIY lava lamp, the lava lamp experiment with baking soda is a phenomenal choice. This rendition involves similar essential standards as the exemplary lava lamp yet acquaints a synthetic response with the percolating impact. We should separate the science and the means for this trial, so you can comprehend how it functions and how to execute it effortlessly.
How to make a lava lamp instructions normally include layering oil and water in a clear container, however with the baking soft drink explorer, you’ll add a thrilling turn. The fundamental idea is basic: baking soda drinks react with an acid, like vinegar, to deliver carbon dioxide gas, which makes bubbles that rise through the oil and water combination, very much like the exemplary lava impact.
- Step 1: Set Up Your Container
Start by filling a reasonable glass holder most of the way with water, and afterward pour in vegetable oil to fill the rest. You’ll see that the two fluids won’t blend since oil is less thick than water, which establishes the ideal climate for the lava impact. - Step 2: Add Color
To make the impact all the more outwardly engaging, add a couple of drops of food shading to the water. You can pick any variety you like, yet red, blue, and green are especially striking. - Step 3: Add Baking Soda
Presently, add a limited quantity of baking soda drink to the water. This will make the underlying effervescing impact. - Step 4: Activate the Lava Effect
Then, pour in vinegar. As the vinegar responds with the baking soda, carbon dioxide is delivered, framing bubbles that ascend through the oil and make a fun and exciting lava lamp impact. You can continue to add vinegar to keep up with the air pockets and the lava stream!
This examination isn’t just a creative method for making a lava lamp, but on the other hand it’s a brilliant instructive chance to investigate substance responses. Whether for a science project or simply a great movement at home, the lava lamp experiment with baking soda brings the enchantment of science in your DIY Yourself creation.
How to Make a DIY Lava Lamp with Water
Assuming you’re searching for a straightforward and captivating lava lamp science experiment, making a lava lamp with water is a brilliant task that shows a few essential logical standards. This strategy is clear and doesn’t need complicated materials, yet it actually conveys the entrancing enhanced visualizations that make lava lamps so dazzling. We should separate the moves toward making your own special lava lamp utilizing water.
- Step 1: Choose the Right Container
Begin by choosing a clear container, for example, a glass container, jug, or jar. The more clear the compartment, the more you’ll have the option to partake in the lava lamp impact. It’s ideal to pick a tall, thin compartment to get a more sensational stream. - Step 2: Fill with Water
Fill your holder most of the way with water, leaving adequate space for the other ingredients. You can likewise add food shading to the water to make it all the more outwardly engaging. Pick any variety that suits your style — red, blue, and yellow are well known choices. - Step 3: Add Oil
Then, gradually empty vegetable oil into the compartment, filling it nearly to the top. Since oil and water don’t blend, the oil will drift over the water. This division is essential for the lava impact, as it makes the layers that make the air pockets rise and fall. - Step 4: Activate the Lava Effect
For the foaming impact, you can utilize Alka-Seltzer or other bubbly tablets. Break the tablets into more modest pieces and drop them into the holder. The tablets will disintegrate, delivering gas and making bubbles that ascent through the oil and water combination.
Fun Ways to Use Your DIY Lava Lamp
A DIY lava lamp can be something other than an enlivening piece right in front of you or rack. There are various inventive and fun ways of integrating your hand crafted lava lamp into different settings and exercises, making it a visual joy as well as a flexible expansion to your space. Here are a few energizing thoughts for how to involve your lava lamp in various conditions.
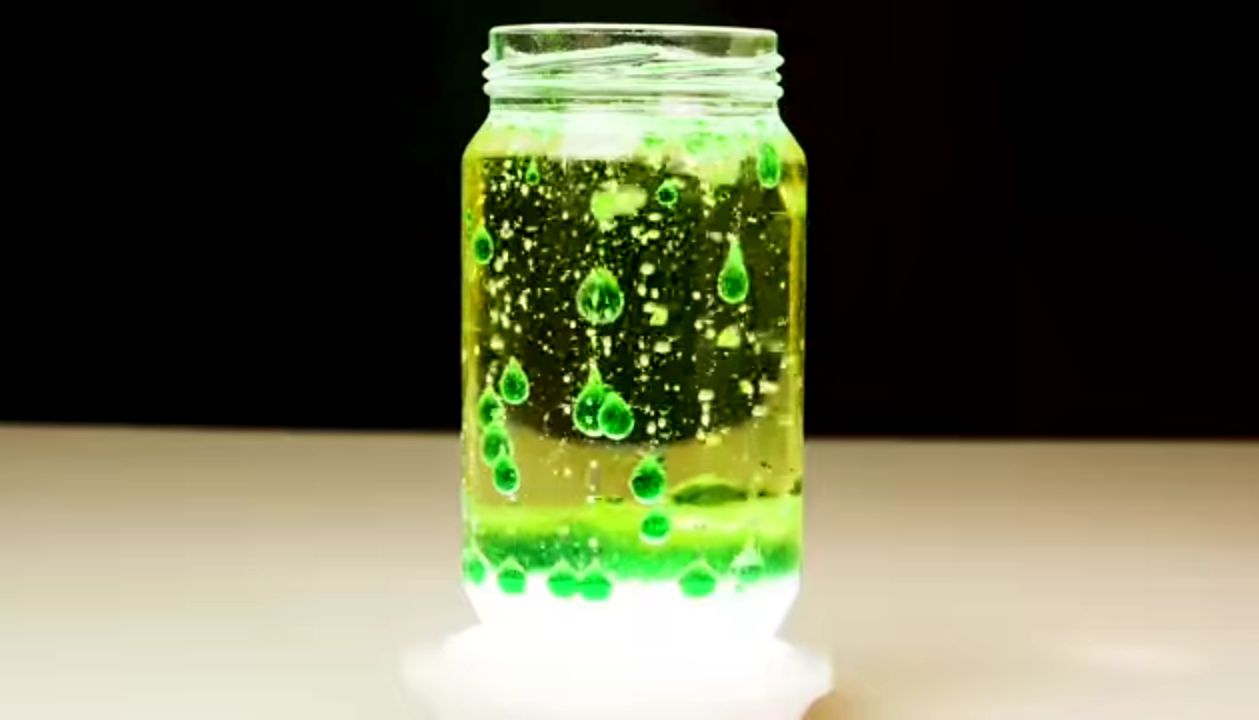
To start with, think about involving your lava lamp in themed gatherings or occasions. For example, on the off chance that you’re facilitating a shine in an obscurity party or Halloween bash, a lava lamp with sparkling, lively tones can add an atmospheric touch.
On the off chance that you’re keen on involving your lava lamp in a party with a more magical energy, take a stab at putting it under a black light vs UV light arrangement. The two sorts of lighting will feature the shades of the lava lamp, making it shine all the more seriously and making a tomfoolery, shocking impact.
Exploring Variations: Sensory and Glow Bottles
Sensory Bottles: These are a brilliant method for presenting a material and visual experience, particularly for kids. Tangible jugs can be loaded up with different materials, like sparkle, dabs, or even little toys, and you can add hued water or oil for a twirling impact.
While the lava movement probably won’t be basically as unmistakable as in a conventional lava lamp, the delicate development of the items gives a mitigating visual. To make it more tomfoolery, have a go at adding a little pottery barn floor lamp close by for a warm, encompassing gleam that upgrades the quieting impact of the tangible jug.
Glow-in-the-Dark Bottles: In the event that you love the gleaming impact of a lava lamp yet need to take it up a notch, glow-in-the-dark bottles are the best approach. These can be made by adding shine in obscurity paint or sparkle to your container, making a charming presentation when the lights are switched off.
Kids’ Science Experiments: Beyond the Lava Lamp
Assuming that you’ve proactively delighted in making a DIY lava lamp for kids, why not take things a stride further by investigating other science tries that can ignite interest and imagination in kids? lava lamps are an extraordinary introduction to science concepts, yet there are a lot of other connections with exercises that join tomfoolery and learning. How about we investigate a few invigorating trials that go past the lava lamp!
One awesome investigation that acquaints youngsters with ideas like thickness and lightness is Float Your Boat. In this movement, children can figure out how various materials respond in water and how to make boats that float or sink. Utilizing straightforward things like plastic, wood, and metal, kids can investigate which materials are awesome for making boats float, showing them fundamental standards of physical science in an involved, intelligent way.
Another fun experiment is The Snowstorm in a Flask. This one mimics the whirling activity of a snowstorm utilizing a comparable technique to the lava lamp, yet with an alternate bend. Utilizing oil, water, and some sparkle, children can make a good time “snow storm” impact by shaking the jar.
Very much like the put under black lava lamp with black lava, this examination shows how various densities and fluids communicate, offering youngsters a chance to see how particles travel through different substances.
Final Thought
All in all, making a DIY lava lamp offers a tomfoolery and imaginative action as well as an instructive encounter that presents significant logical ideas like thickness, synthetic responses, and lightness. Whether you utilize bubbly tablets, baking soda, or essentially depend on oil and water, the put under movement of a homemade lava lamp charms the two children and grown-ups the same.
Beyond the lava lamp, there are various other exciting and simple science explorations that can ignite interest and cultivate learning in children. From moving raisins to sludge making and even water filtration, the opportunities for active science investigation are endless.
These DIY projects give an ideal mix of imagination and training, helping kids with understanding their general surroundings while having a blast time simultaneously. In this way, get everything rolling on your lava lamp experience today, and investigate the universe of science with fun, safe, and engaging experiments!
FAQs
1. Can you make a lava lamp without effervescent tablets?
Yes, you can! While bubbly tablets like Alka-Seltzer are ordinarily utilized for their foaming activity, there are elective ways of making the lava impact. You can utilize baking soda and vinegar to make a comparative bubbling response, or have a go at utilizing a water-based blend with various oils and colors for a more slow moving, quieting impact.
2. How long does a homemade lava lamp last?
A very much created homemade lava lamp can keep going for a really long time or even years, contingent upon the materials you utilize and how well you keep up with it. The oil and water combination ought to stay isolated, and the magma impact ought to go on as long as you don’t open it to outrageous temperatures or direct daylight for delayed periods.
3. Are DIY lava lamps safe for kids?
Yes ,DIY lava lamps for kids are for the most part protected for however long they are made with non-poisonous materials. Ensure that kids are managed during the cycle, particularly while taking care of little things like bubbly tablets or fluids. Continuously utilize a strong holder to stay away from spills or mishaps.
4. Can I customize my lava lamp with other materials?
Totally! You can explore different avenues regarding adding sparkle, dabs, or gleam in obscurity components to make your lava lamp considerably more fool and special. Go ahead and get innovative with your plan!